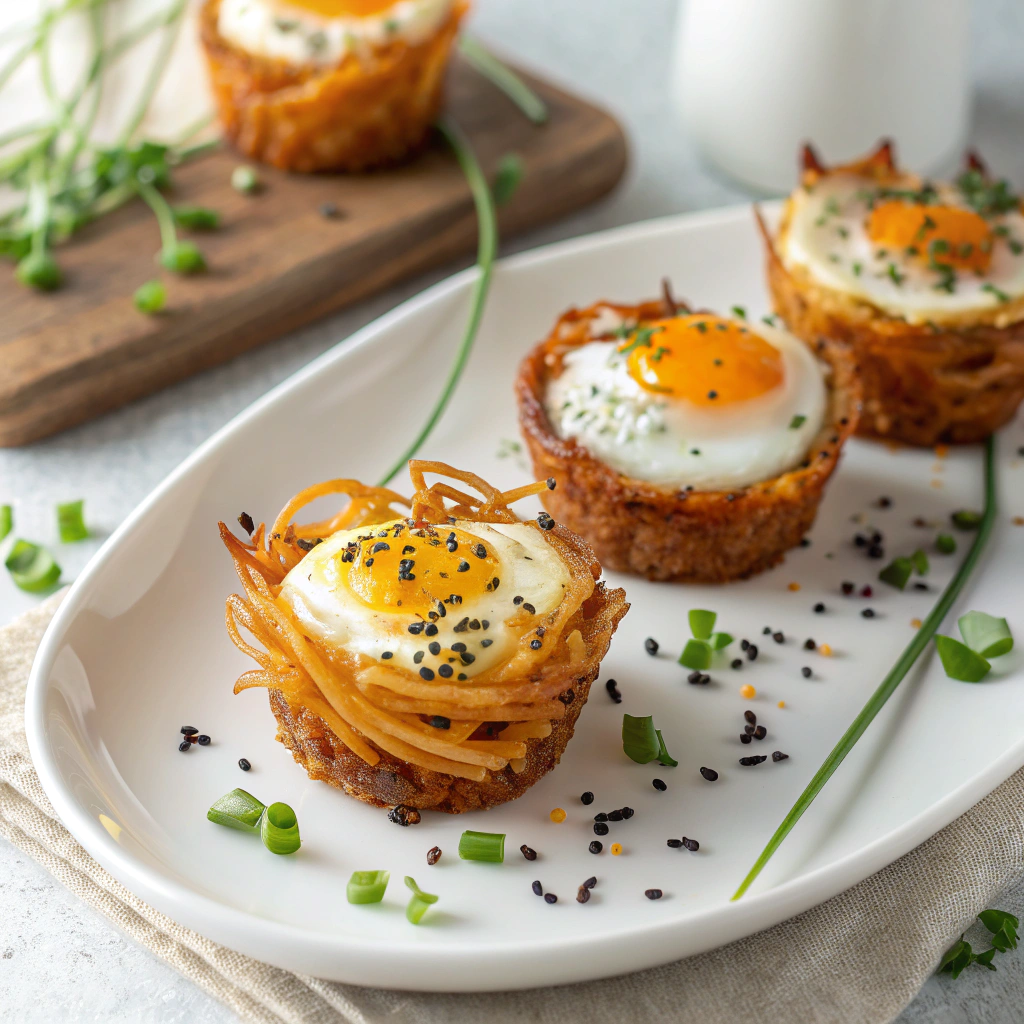
🍠 Crispy Sweet Potato Noodle Egg Nests (with Chili Crunch Magic)
You want breakfast that looks fancy, cooks fast, and actually fills you up. These sweet potato noodle egg nests do all three. They’re crispy, cozy, a little spicy, and wildly Instagrammable. I make them when I want brunch vibes without a brunch bill. 😎
⚡ Quick Snapshot
- 20-minute bake. Minimal babysitting.
- 4 core MVPs: sweet potatoes, eggs, olive oil, chili crunch.
- High-protein, high-fiber, gluten-free.
- Works for breakfast, lunch, or that “I forgot dinner” moment.
- Meal-prep friendly. Reheat like a champ.
🧰 Why Sweet Potato Noodles Win
- They crisp up like hash browns, but sweeter and fancier.
- They hold the egg snugly—built-in nest = zero egg sprawl.
- They play nice with spice, herbs, cheese—go wild.
- Bonus: Vitamin A flex. Your eyes say thanks.
🛒 Ingredient Lineup (Keep It Simple)
| Item | Purpose | Amount |
|---|---|---|
| Sweet potatoes, spiralized | Crispy noodle base | 2 medium (about 4 cups) |
| Eggs | Protein center | 6 large |
| Olive oil | Golden edges | 2–3 tbsp |
| Chili crunch (or chili crisp) | Heat + texture | 2–3 tbsp |
| Salt + pepper | Flavor baseline | To taste |
| Optional: garlic powder, smoked paprika | Extra depth | 1 tsp total |
| Optional: parmesan or feta | Salty finish | 1/4 cup |
| Optional: herbs (chives, parsley) | Fresh pop | Handful |
Pro tip: No spiralizer? Use a julienne peeler or buy pre-spiralized sweet potatoes. I’ve done all three, zero shame. 🙂
🍳 Pan vs. Muffin Tin: Pick Your Path
| Method | Why Choose It | Notes |
|---|---|---|
| Sheet pan nests | Crispier edges, faster cleanup | Great for 4–6 nests |
| Muffin tin cups | Perfectly round, meal-prep ready | Slightly softer edges |
I usually go sheet pan for max crunch, muffin tin when I’m planning grab-and-go breakfasts.
🌀 6-Step Game Plan
- Preheat to 400°F (205°C). Line a sheet pan and lightly oil it.
- Toss noodles with olive oil, salt, pepper, and optional spices.
- Form 6 small nests. Press a well in the center with a spoon.
- Par-bake 8–10 minutes until edges look slightly golden.
- Crack an egg into each nest. Bake 6–9 minutes more, depending on how runny you like it.
- Spoon on chili crunch, add cheese/herbs if using, and serve hot.
Too runny? Bake an extra 1–2 minutes. Too firm? Pull sooner next time. It’s your yolk journey.
🌶️ Chili Crunch = Flavor Elevator
Chili crunch adds heat, umami, and crispy bits that make these nests pop. If you’re spice-shy, start with a light drizzle. If you’re me, you go full “did I just add a tablespoon?” Yes. And it slaps.
Alternatives: sriracha + sesame oil, harissa, or a dusting of smoked paprika and red pepper flakes.
🎯 Cook Times Cheat Sheet
| Yolks | Bake Time (after par-bake) | Texture |
|---|---|---|
| Runny | 6–7 minutes | Dippable, luxe |
| Jammy | 8 minutes | Crowd-pleaser |
| Set | 9–10 minutes | Kid-proof, sandwich-friendly |
Note: Muffin tins may take +1 minute.
🎨 Remix Ideas
- Green Machine: Add a handful of finely chopped spinach to the noodles.
- Breakfast Club: Top with crumbled bacon or breakfast sausage.
- Mediterranean: Feta, olives, dill, lemon zest.
- Tex-Mex: Cheddar, pico de gallo, avocado, lime.
- Protein Boost: Serve with Greek yogurt + lemon on the side. Sounds weird. Tastes awesome.
🥄 Serving Suggestions
- Brunch Plate: Two nests + arugula salad with lemon vinaigrette.
- Sandwich Upgrade: Slide a nest into a toasted English muffin.
- Leftover Hero: Reheat in air fryer 2–3 minutes at 375°F (190°C). Still crisp. Still great.
💪 Health Perks (No Snoozy Science)
- Sweet potatoes bring fiber and beta-carotene.
- Eggs stack protein for steady energy.
- Chili crunch wakes up your metabolism like a tiny drumline.
- You stay full without a carb crash. That 3 p.m. slump? Not invited.
❓ Rapid-Fire FAQ
- Can I prep ahead?
Yes. Par-bake nests, cool, refrigerate 2–3 days. Add eggs and finish baking when ready. - No spiralizer—am I doomed?
Nope. Julienne peeler, box grater (coarser side), or store-bought spirals all work. - Can I go dairy-free?
Absolutely. Skip cheese or use a dairy-free crumble. Flavor still hits. - Spicy but kid-friendly?
Add chili crunch to your plate only. Keep nests mild for the littles. 😉
🔥 Pro Tips You’ll Actually Use
- Dry the noodles with a paper towel if they’re wet. Moisture kills crisp.
- Press the wells deep so the whites don’t escape.
- Oil the pan generously for those golden, frizzled edges.
- Finish with acid: a squeeze of lemon makes everything brighter.
- Add a pinch of salt right on the yolk. Tiny move, big payoff.
🧾 At-a-Glance Recipe Card
| Step | Action | Detail |
|---|---|---|
| 1 | Prep | 400°F (205°C), oil sheet pan |
| 2 | Toss | Noodles + oil + salt/pepper (+ spices) |
| 3 | Shape | 6 nests with deep wells |
| 4 | Par-bake | 8–10 min until lightly golden |
| 5 | Egg it | Crack 1 egg per nest |
| 6 | Finish | Bake 6–9 min to preferred yolk |
| 7 | Top | Chili crunch, cheese, herbs, lemon |
🎉 The Last Bite
These sweet potato noodle egg nests look fancy, taste epic, and still fit into a busy morning. You get crispy edges, silky yolks, and that chili crunch kick—aka breakfast worth getting out of bed for. So yeah, if you’ve been sleeping on this, now’s the time to wake up and give it a shot. Trust me—you’ll thank yourself later. 😉

